As Salaamu Alaikum and good morning. How is everyone feeling on this lovely Thursday morning? Oh how I love the mornings and I love Thursdays! Well I guess that I love everyday of the week. Alhumdulilah for each day! On this beautiful day that Allah has given us we are insha Allah going to make the best of it and be the most productive we that we can be. Insha Allah we are going to take full advantage of our time, study something new, read something new, try a new dish, create a new memory with your families, tell an old Friend something new. Oh the possibilities, insha Allah today will be wonderful!
If there is anyone out there like me, who desires to update, or renovate their kitchen, but the cost is just out of reach right now. Boy have I found the perfect solution for you. Even if you are renting this one may actually be doable. (Is that a word)?
The Back Splash
This one little change in your kitchen can do wonders, it can change the look of your kitchen. Showcase your personality, add some color, make the space feel new. All with just a simple little DIY project, come one sisters don't let me take on this task by myself. Let's roll up oursleeves, push aside our aprons, kick off those heels, take the baby off your hips, and get our hands dirty for creative purposes. Let's have some fun! I am going to take you through the step by step process and provide you with a list of materials needed as well as possible cost.
- acrylic craft paints
- water-based polyurethane sealer
- latex wall paint, flat finish
- foam sheets to make stamps
It should require no more than 2 days and cost no more than $50.
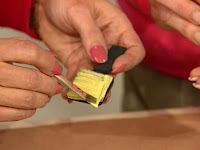
To make your own foam stamps, cut a pattern from foam sheets, available at craft stores. To make small tiles, cut a 1-1/4 inch square, with a handle for applying and removing the stamp. Carefully trim away a bit of the foam between the stamp and the handle to form a channel. The channel prevents paint from building up on the handle and being transferred to the surface that is being stamped.
Before stamping, paint your project surface with flat latex wall paint. Avoid a glossy-finish paint, which will cause the stamps to slide around as you're stamping.
Use a small brush to apply a minimal amount of acrylic craft paint to the foam stamp. Unlike sponges, which soak up paint, foam stamps are not absorbent, so very little paint is required to print a crisp design. (be creative with the colors if you like)
Begin your tiled wall by pressing the square foam stamp to the wall in an even checkerboard pattern, leaving 1/8" between squares to create a "grout line". Use each paint-loaded stamp at least four times before reapplying paint. The varying color gradations from tile to tile imitate the look of real tile. If desired, go back over individual squares with other tints to enhance the appearance.
Cover your project area completely with a tile-stamped pattern, or use pre-made or custom-made stamps to paint fruit or vegetables in the middle of the back splash. Wash the foam stamps thoroughly when finished.
When you're satisfied with the design, dip a liner brush in the flat wall color, and carefully go over the 1/8" spaces left between "tiles" to simulate grout and to make the design appear as though it was made of individual tiles.
When the tile-painted surface is complete and dry, protect the entire area with a coat or two of polyurethane sealer.


Do your thing baby, Fullltime Muslim husband will be watching, my favorite colors in the kitchen are blue, yellow, and white. Hook it up. Love you
ReplyDeleteMy biggest fan and supporter I love you!!!
Delete